A Page from the Past
I have a complete set of Pathfinder Arithmetic Books from the dark ages (1958) and can’t help but look back to see how far we have or haven’t progressed and how much has changed for better or for worse.
At the end of each of the books is a section called Ruler Work. Unlike many activities that students are asked to engage in today, the activities use measurement to construct drawings of diagrams and objects. They also include options for students to add some creativity to the objects drawn. Of particular interest was the little bit of explicit teaching at Book 1 level to ensure that students learn how to count the units on the ruler. So many students today have common error patterns about what to count and why there is a zero at the beginning of the ruler.
I have included samples from Books 1 to 3. They could easily be converted into centimetres and used as class a group strategy lessons.
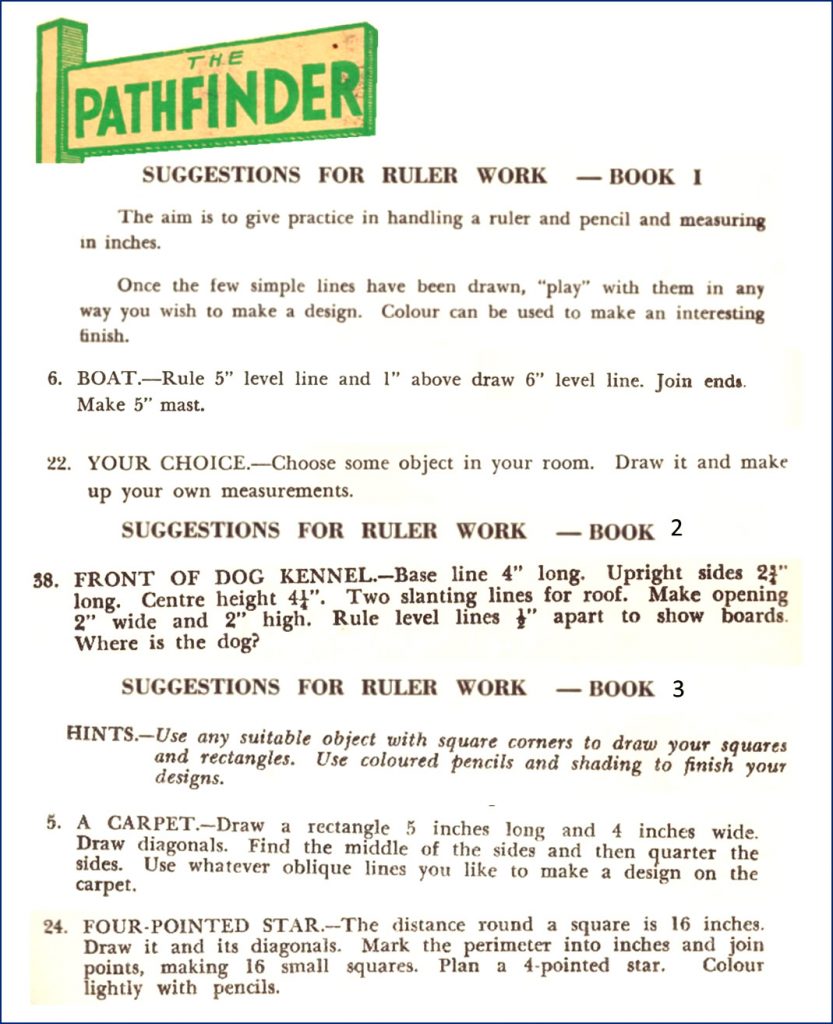
One of the reasons I like activities of this type is that when measurements are used for practical design purposes any errors are obvious; the object drawn just won’t look right. The student will not need teacher judgement; they will know for themselves and can fix up the drawing (with or without assistance).
Father’s Day is coming so maybe a simple pop-up card would be timely and provide some ruler work! In the example below I folded an A 4 sheet of paper into quarters as follows.
- Fold the A4 paper into an A5 shape, then fold again to make an A6 size card.
- Open up into an A4 shape and fold the two long edges together to make a crease along the middle which can be folded in both directions. Fold along this crease to make a long strip.
- Fold the long strip to make an A6 size card and open it out ready for the cut.
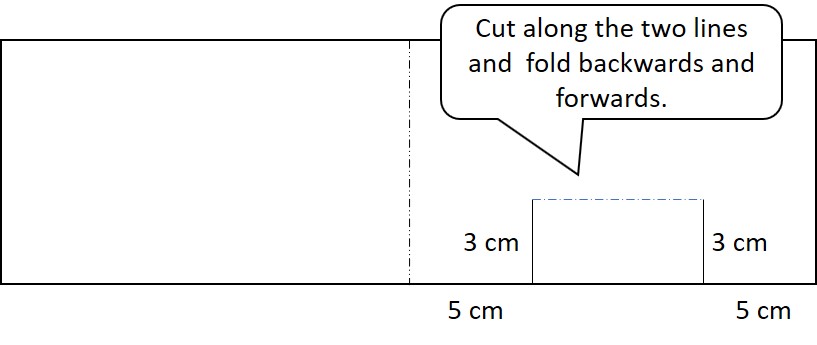
- Mark two lines that are 3 cm long and 5 cm in from the crease and one end of the strip. Cut along the lines and fold the flap you made backwards and forwards to make the pop-up.
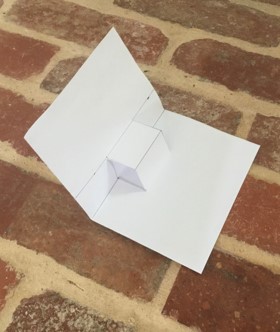
- Open the paper up and fold it back into an A6 card and you will be able to make the pop-up open into the middle of the card. Your card should look something like:
Teaching points
Show the students:
- how to measure 5cm in from the right and centre crease and make two marks ready for the cut lines.
- how to measure 3 cms up from the fold line along the 5cm marks.
- how to open the strip and fold the A4 sheet into an A6 card again, this time making sure that the pop-up section is no longer next to the long crease.
The students can now decorate their card and add an object to the pop up stand. Have fun. Love to see some results.
As you know, we are encouraging teachers to move away from worksheets and use more engaging and meaningful tasks so check out our No Worksheet Required packages.